Your puppy has been shaking their head more than usual, scratching one ear, or leaving a faint musty smell behind after cuddle time. It’s easy to wonder whether it’s just a little dirt or the beginning of an ear problem. The good news is that learning a few puppy ear cleaning tips can help you keep your puppy’s ears healthy and catch small issues before they become painful infections.
Many first-time puppy owners worry they’ll hurt their puppy while cleaning their ears. In reality, cleaning a puppy’s ears is simple when you use the right technique, the right products, and know when to stop. The goal isn’t to clean every day it’s to remove wax, dirt, and moisture only when needed while protecting the delicate skin inside the ear.
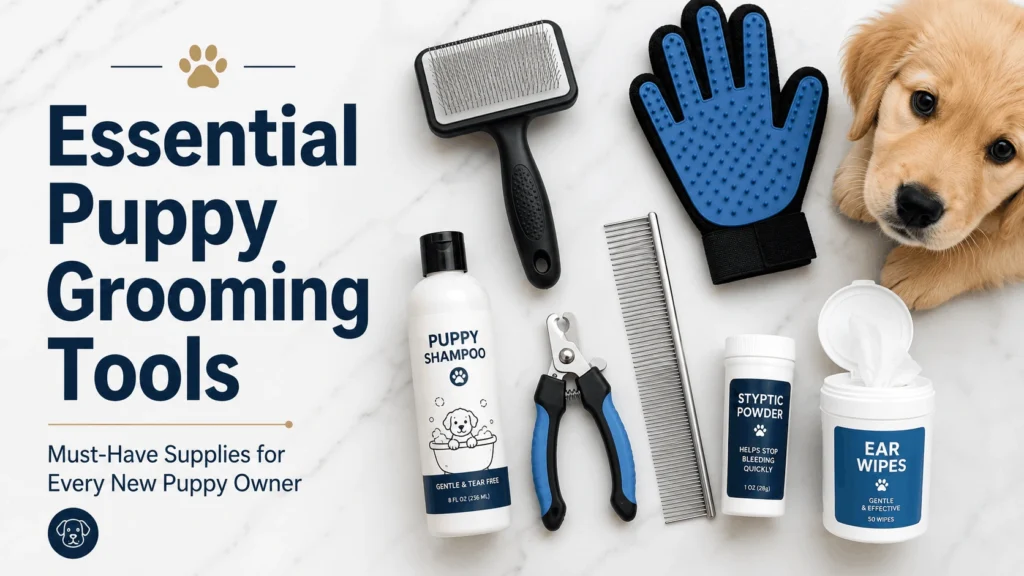
In this guide, you’ll learn how often to clean your puppy’s ears, what supplies you actually need, the safest step-by-step cleaning method, common mistakes to avoid, and the warning signs that mean it’s time to call your veterinarian. If you’re building a full grooming routine, pair this with our guides on how to brush a puppy and puppy nail trimming tips for complete at-home care.
Quick Answer: Puppy Ear Cleaning Tips
Most puppies only need their ears checked every one to two weeks and cleaned when you notice wax, dirt, mild odor, or debris. Use a vet-approved dog ear cleaning solution, gently massage the base of the ear for about 30 seconds, allow your puppy to shake their head, then wipe away loosened debris with a cotton ball or gauze. Never insert cotton swabs into the ear canal.
Why Puppy Ear Cleaning Matters
Your puppy’s ears may look clean from the outside, but the inside of the ear creates an environment where moisture, wax, and debris can easily collect.
Unlike human ears, a dog’s ear canal forms an L-shaped passage. This design protects the eardrum, but it also makes it much harder for trapped dirt and moisture to drain naturally. Over time, that buildup can create ideal conditions for bacteria and yeast to multiply.
A simple cleaning routine helps prevent many common ear problems before they become painful or expensive to treat.
Regular ear checks also help you notice subtle changes, such as redness, unusual discharge, or a new odor, while they’re still easy to address.
Many veterinarians recommend making ear inspections part of your puppy’s regular grooming routine, along with checking their teeth, nails, eyes, and paws.
Understanding Your Puppy’s Ear Anatomy
Before you clean your puppy’s ears, it’s helpful to understand how they’re built.
Many owners worry they’ll accidentally damage the eardrum during cleaning. Fortunately, a dog’s ear anatomy makes that much less likely than most people think.
Instead of a straight canal like humans have, a puppy’s ear canal has two sections:
- A vertical canal that runs downward from the ear opening.
- A horizontal canal that turns inward toward the eardrum at nearly a right angle.
This bend acts as a natural barrier, making it difficult to accidentally reach the eardrum during normal at-home cleaning. Veterinary sources like VCA Animal Hospitals confirm this L-shaped canal design is what makes gentle at-home cleaning low-risk when it’s done correctly.
However, that same bend is also why wax, dirt, pollen, and moisture often become trapped instead of draining out on their own.
That’s exactly why gentle ear cleaning plays such an important role in your puppy’s grooming routine.
What Does a Healthy Puppy Ear Look Like?
Knowing what’s normal makes it much easier to recognize when something isn’t.
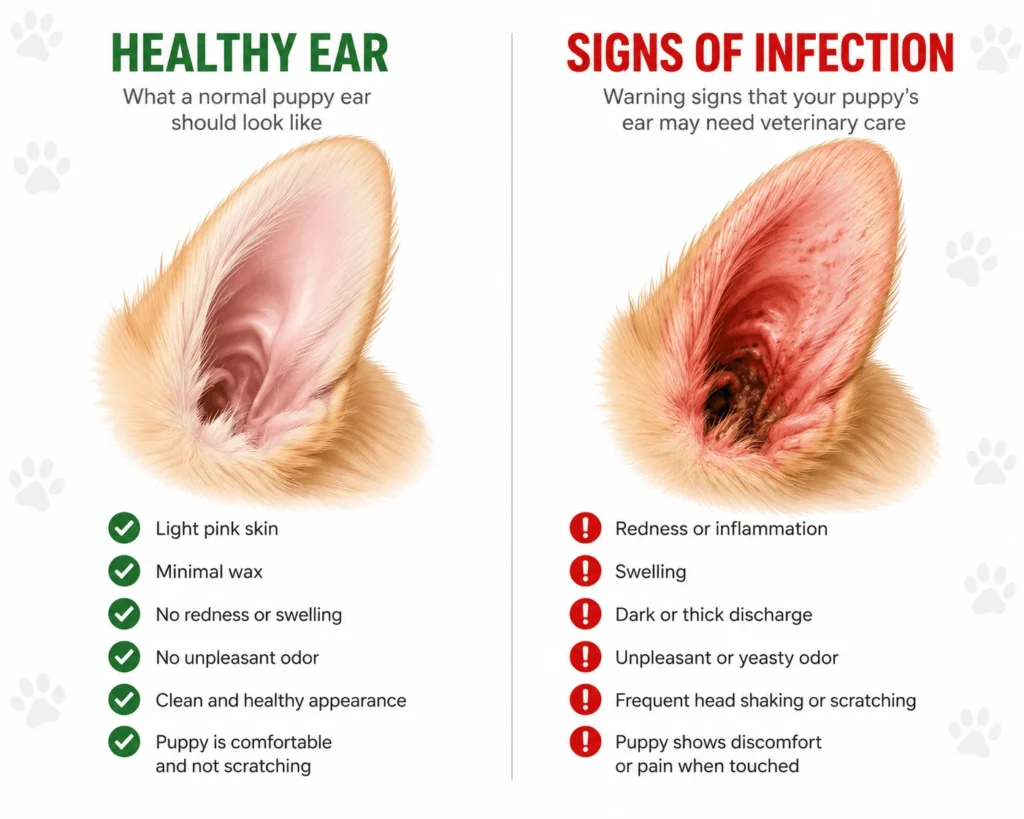
A healthy puppy ear should look clean, comfortable, and free of irritation.
Healthy Puppy Ear Checklist
✔ Light pink skin inside the ear
✔ Very little wax
✔ No redness or swelling
✔ No unpleasant odor
✔ No thick discharge
✔ Comfortable when gently touched
✔ Puppy doesn’t constantly scratch or shake their head
Some light tan or pale yellow wax is perfectly normal.
Not every puppy has spotless ears all the time.
The goal isn’t perfectly clean ears it’s healthy ears.
Signs Something May Be Wrong
Certain changes suggest your puppy may need more than a routine cleaning.
Watch for:
- Frequent head shaking
- Constant ear scratching
- Head tilting
- Red or swollen ear canals
- Thick yellow, brown, or black discharge
- Strong yeasty or foul odor
- Crusting around the ear opening
- Pain when touching the ear
- Whining during ear handling
These signs may indicate:
- Ear infection
- Ear mites
- Allergies
- Foreign material such as grass seeds
- Injury inside the ear
Cleaning alone usually won’t solve these problems.
If your puppy shows several of these symptoms, it’s best to schedule a veterinary examination rather than repeatedly cleaning the ears at home.
Which Puppies Need Ear Cleaning Most Often?
Every puppy is different.
Some naturally produce very little ear wax, while others need more frequent care because of their breed, lifestyle, or health.
Puppies at higher risk include:
Floppy-Eared Breeds
Breeds with long hanging ears trap more heat and moisture.
Examples include:
- Cocker Spaniels
- Basset Hounds
- Beagles
- Labrador Retrievers
- Golden Retrievers
Reduced airflow creates an ideal environment for yeast and bacteria.
Puppies That Swim Often
Water left inside the ears after swimming can quickly become trapped.
Even healthy ears benefit from being dried and checked after water activities.
Allergy-Prone Puppies
Food allergies and environmental allergies often cause inflammation inside the ears before owners notice skin problems elsewhere.
These puppies may require more frequent veterinary monitoring.
Puppies With Hairy Ear Canals
Some breeds naturally grow hair inside the ear canal.
That extra hair can reduce airflow and trap wax.
Your veterinarian or groomer can advise whether gentle trimming is appropriate.
Common Causes of Dirty Puppy Ears
Not every dirty ear means an infection.
Several everyday factors contribute to wax and debris buildup.
Normal Ear Wax
Wax protects the ear by trapping dust and tiny particles before they reach deeper structures.
Small amounts are completely normal.
Outdoor Adventures
Puppies love exploring.
Grass seeds, dust, sand, and pollen can all collect inside the ear after walks or playtime.
Moisture
Baths, rain, and swimming all introduce extra moisture.
If the ears don’t dry well, bacteria and yeast may begin multiplying.
Allergies
Allergies often increase wax production and inflammation, making ears feel itchy and uncomfortable.
Ear Mites
Although more common in very young puppies and shelter animals, ear mites can produce dark, crumbly debris that resembles coffee grounds.
Unlike simple wax buildup, ear mites require veterinary diagnosis and prescription treatment.
Why Early Ear Care Makes Life Easier
Cleaning your puppy’s ears isn’t just about hygiene.
It’s also about training.
The earlier your puppy learns that ear handling is safe and rewarding, the easier future grooming, veterinary exams, and medication become.
Many experienced dog owners spend just a few minutes each week gently touching their puppy’s ears, lifting the ear flaps, and rewarding calm behavior with treats.
These short sessions build trust long before your puppy ever needs a full ear cleaning.
Instead of wrestling with an anxious adult dog later, you’re teaching your puppy that ear care is simply another normal part of life.
Tools You Actually Need
One of the biggest misconceptions about puppy ear care is that you need a drawer full of grooming supplies. In reality, a few simple items are all it takes to clean your puppy’s ears safely.
Using the right tools also reduces the chance of irritation or accidental injury. If you’re still building your puppy’s grooming kit, our roundup of the best puppy grooming tools every new owner needs covers everything from brushes to nail clippers in one place.
| Tool | Purpose |
|---|---|
| Vet-approved dog ear cleaning solution | Loosens wax, dirt, and debris while helping dry excess moisture. |
| Cotton balls or sterile gauze | Wipes away loosened wax and debris from the visible part of the ear. |
| Small treats | Rewards calm behavior and creates a positive experience. |
| Soft towel | Protects your clothes and floor from the inevitable head shake. |
What You Should Never Use
Some household items can do more harm than good.
Avoid using:
❌ Cotton swabs (Q-tips)
❌ Hydrogen peroxide
❌ Rubbing alcohol
❌ Vinegar mixtures unless specifically recommended by your veterinarian
❌ Essential oils
❌ Human ear-cleaning products
Cotton swabs are especially risky because they often push debris deeper into the ear canal instead of removing it. They can also irritate the delicate lining of the ear.
Stick to cleaning only the areas you can comfortably reach with your finger wrapped in cotton or gauze.
Choosing the Right Ear Cleaning Solution
Not all ear cleaners are the same.
Look for a veterinary-approved ear cleaner that is:
- Designed specifically for dogs
- Gentle and non-irritating
- Alcohol-free unless prescribed
- pH-balanced for canine ears
- Effective at dissolving wax and drying excess moisture
If your puppy has frequent ear infections, allergies, or sensitive skin, ask your veterinarian which product is most appropriate.
Never use medicated ear drops unless they have been prescribed for your puppy.
How Often Should You Clean a Puppy’s Ears?
There isn’t a single schedule that works for every puppy.
The ideal cleaning frequency depends on your puppy’s breed, ear shape, activity level, and overall health.
For many puppies, regular inspections are more important than regular cleaning.
General Ear Cleaning Schedule
| Puppy Type | Ear Check | Full Cleaning |
|---|---|---|
| Upright ears with minimal wax | Every 2 weeks | Only when needed |
| Average puppies | Weekly | Every 2–4 weeks if buildup appears |
| Floppy-eared breeds | Weekly | Often every 1–2 weeks, or as advised by your veterinarian |
| Puppies that swim frequently | After swimming | As needed to remove moisture and debris |
The goal is to clean when necessary, not according to a rigid calendar.
Healthy ears don’t need constant cleaning.
Signs It’s Time to Clean Your Puppy’s Ears
Instead of following a strict schedule, look for these early signs:
- Light wax buildup
- Dirt or debris after outdoor play
- Mild musty smell
- Moisture after swimming or bathing
- Small amounts of visible discharge that are not accompanied by redness or pain
If your puppy seems uncomfortable, or if you notice redness, swelling, thick discharge, or a strong odor, skip the cleaning and contact your veterinarian.
Step-by-Step Guide: How to Clean Your Puppy’s Ears Safely
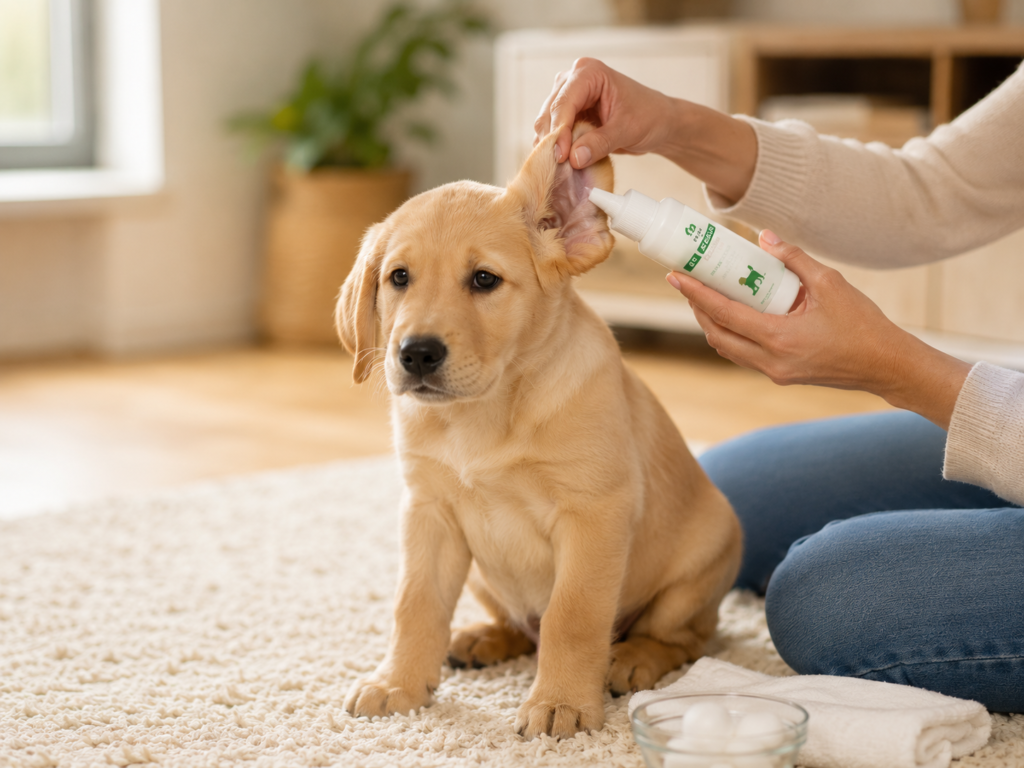
Cleaning your puppy’s ears doesn’t have to be stressful.
Keeping the session calm and positive will make future cleanings much easier.
Step 1: Choose the Right Time
Pick a moment when your puppy feels relaxed.
Good times include:
- After a walk
- Following playtime
- Before bedtime
A tired puppy is usually much more cooperative than one full of energy.
Step 2: Let Your Puppy Inspect the Supplies
Hold out the bottle of ear cleaner and a cotton ball.
Allow your puppy to sniff them.
Reward curiosity with a treat.
This simple step helps reduce anxiety because your puppy learns the supplies aren’t something to fear.
Step 3: Lift the Ear Flap
Gently fold the ear flap upward.
This straightens the vertical part of the ear canal and makes the cleaning solution easier to apply.
There’s no need to force the ear open.
Gentle handling is all that’s required.
Step 4: Apply the Ear Cleaning Solution
Place the tip of the bottle just above the ear canal without inserting it deeply.
Squeeze enough solution into the ear to fill the visible canal.
It’s perfectly normal if a little solution spills out.
Avoid touching the bottle tip directly against the ear to help keep it clean.
Step 5: Massage the Base of the Ear
Once the solution is inside, gently massage the base of your puppy’s ear for about 30 seconds.
Use slow circular motions.
You’ll often hear a soft squishing sound.
That’s a good sign it means the cleaner is breaking up wax and debris deeper in the canal.
Many puppies actually enjoy this part.
Step 6: Let Your Puppy Shake Their Head
Now step back.
Your puppy will almost certainly shake their head vigorously.
While messy, this is exactly what you want.
The shaking naturally brings loosened wax, dirt, and excess solution toward the outer ear where it’s easy to remove.
Keep your towel nearby because tiny droplets may fly farther than you expect.
Step 7: Wipe Away Debris
Wrap a cotton ball or gauze around your finger.
Gently wipe the visible parts of the ear.
Only clean as far as your finger naturally reaches.
Never push deeper into the ear canal.
Repeat the process on the other ear if needed.
Finish by praising your puppy and offering a favorite treat.
Ending every session on a positive note helps build lifelong cooperation.
How Long Should Ear Cleaning Take?
A routine ear cleaning shouldn’t take long.
For most puppies, the entire process takes about 5 to 10 minutes, including rewards and cleanup.
The more often your puppy experiences calm, positive ear handling, the faster and easier future sessions become.
Benefits of a Regular Ear Care Routine
A few minutes of preventative care can save both discomfort and costly veterinary visits later.
Regular ear checks and cleaning when needed can:
- Reduce the risk of bacterial and yeast infections
- Remove trapped dirt, wax, and moisture
- Improve airflow inside the ear
- Catch problems before they become serious
- Help your puppy become comfortable with handling
- Make future veterinary exams less stressful
- Support overall grooming and hygiene
Many puppy owners also become much more confident after a few successful cleanings.
Instead of worrying every time their puppy shakes its head, they know exactly what healthy ears should look like.
Creating Positive Associations
Your puppy will remember how ear cleaning feels.
If every session involves restraint and frustration, future cleanings become much harder.
Instead:
- Speak calmly throughout the process.
- Use plenty of praise.
- Offer treats before, during, and after cleaning.
- Keep sessions short.
- Stop if your puppy becomes overly frightened or stressed.
Building trust is just as important as removing wax.
A relaxed puppy is easier to groom, easier to examine, and less likely to resist veterinary care as they grow.
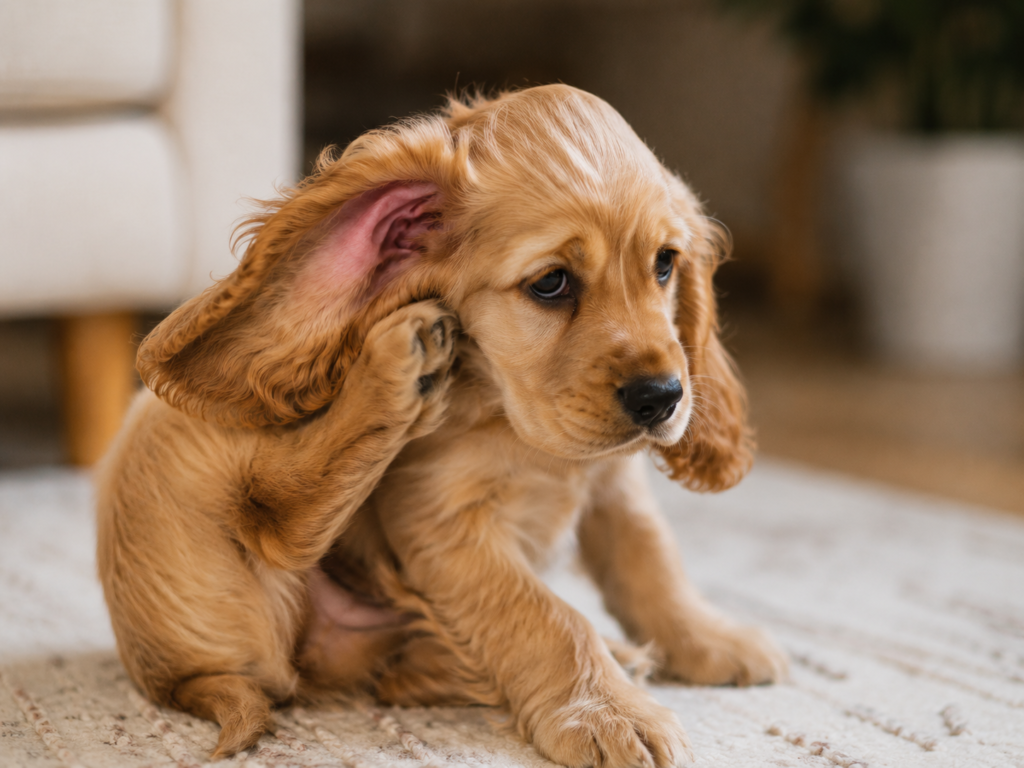
Common Ear Problems (and What to Do)
Even with a good cleaning routine, puppies can still develop ear problems. The key is recognizing the warning signs early instead of assuming every issue can be solved with another cleaning.
1. Ear Infections
Ear infections are one of the most common reasons puppies visit the veterinarian.
They usually develop when bacteria or yeast multiply inside a warm, moist ear canal.
Common Signs
- Frequent head shaking
- Constant scratching
- Redness inside the ear
- Swelling
- Thick yellow, brown, or green discharge
- Strong unpleasant odor
- Pain when the ear is touched
A cleaning solution alone won’t cure an infection.
If you notice these symptoms, schedule a veterinary appointment rather than trying multiple home remedies.
2. Ear Mites
Ear mites are tiny parasites that live inside the ear canal.
They’re most common in young puppies, rescue dogs, and pets that have close contact with other animals.
Signs of Ear Mites
- Intense scratching
- Constant head shaking
- Dark, crumbly debris that looks like coffee grounds
- Irritated ears
- Restlessness
Ear mites require prescription treatment from a veterinarian.
Cleaning the ears may remove some debris, but it won’t eliminate the mites themselves.
3. Moisture Build-Up
Water trapped inside the ears after swimming or bathing can quickly create an environment where bacteria and yeast thrive.
This is especially common in puppies with floppy ears.
Prevention Tips
- Dry the outer ear gently after every bath.
- Allow your puppy to shake their head naturally.
- Ask your veterinarian about drying ear cleaners if your puppy swims frequently.
4. Allergies
Some puppies produce excessive ear wax because of food or environmental allergies.
You may notice:
- Recurring ear irritation
- Red skin
- Paw licking
- Face rubbing
- Repeated infections
If ear problems keep returning despite proper cleaning, allergies may be the underlying cause.
When Should You Skip Cleaning and Call the Vet?
Cleaning is helpful for healthy ears with mild wax or dirt.
It is not the right solution when your puppy is already in pain.
Contact your veterinarian if you notice:
- Severe redness
- Swelling
- Thick discharge
- Bleeding
- Strong foul odor
- Head tilt
- Loss of balance
- Crying when the ear is touched
- Hearing changes
- A foreign object inside the ear
Trying to clean an infected or injured ear can make the problem worse and cause unnecessary discomfort.
Expert Tips for Easier Ear Cleaning
Many experienced puppy owners find that a few small habits make ear care much easier over time.
Start Young
Begin gently handling your puppy’s ears from the first week they come home.
Even if no cleaning is needed, lift each ear flap, touch around the ears, and reward calm behavior.
This builds trust before your puppy ever needs a full cleaning.
Clean Before Bath Time
Many owners assume ears should be cleaned after a bath.
In reality, cleaning before bathing can be more effective because you’re less likely to trap fresh moisture inside the ear canal.
After the bath, gently dry the outside of the ears if they become wet.
Use Plenty of Rewards
Treats are powerful training tools.
Offer a small reward:
- Before cleaning
- During handling
- After each ear
- At the end of the session
Over time, your puppy will begin to associate ear cleaning with positive experiences instead of stress.
Keep Sessions Short
There’s no need to rush, but there’s also no reason to turn ear cleaning into a long grooming session.
Five calm minutes is far better than twenty stressful ones.
If your puppy becomes anxious, take a break and try again later.
Check During Regular Grooming
One of the easiest ways to remember ear care is to pair it with another routine.
Many owners check ears while:
- Brushing the coat
- Trimming nails
- Cleaning teeth
- Giving monthly flea prevention
This simple habit helps catch problems early.
Common Mistakes to Avoid
Even well-meaning puppy owners sometimes make mistakes that can irritate healthy ears.
Avoid these common errors.
Using Cotton Swabs
Cotton swabs push wax deeper into the ear canal instead of removing it.
Stick to cotton balls or gauze wrapped around your finger.
Cleaning Too Often
Healthy ears don’t need daily cleaning.
Over-cleaning removes natural protective oils and can irritate the skin inside the ear canal.
Ignoring Bad Odors
A strong smell isn’t normal.
If your puppy’s ears smell yeasty or foul, don’t simply keep cleaning them.
Have your veterinarian determine the cause.
Using Human Ear Products
Human ear cleaners aren’t formulated for dogs.
Always choose products specifically designed for canine ears.
Forgetting to Dry the Ears
Moisture left behind after baths or swimming encourages bacterial and yeast growth.
Always allow your puppy to shake their head naturally and gently dry the outer ear afterward.
Forcing the Process
Holding your puppy down or forcing them through a stressful cleaning session often creates long-term fear of grooming.
Patience and positive reinforcement produce much better results.
Frequently Asked Questions
How often should I clean my puppy’s ears?
Most puppies only need their ears checked every one to two weeks and cleaned when you notice wax, dirt, or a mild odor. Puppies with floppy ears, allergies, or frequent swimming habits may need more regular care based on your veterinarian’s recommendations.
What can I safely use to clean my puppy’s ears?
Use a veterinary-approved dog ear cleaning solution along with cotton balls or sterile gauze. Avoid cotton swabs, hydrogen peroxide, rubbing alcohol, or homemade mixtures unless your veterinarian specifically recommends them.
Is it normal for puppy ears to have a slight smell?
A very mild, neutral scent can be normal.
However, a strong yeasty, sour, or foul odor usually indicates infection or excessive yeast growth and should be evaluated by your veterinarian.
Can I use cotton swabs inside my puppy’s ears?
No.
Cotton swabs often push wax and debris deeper into the ear canal and may cause irritation.
Only clean the visible portion of the ear using cotton balls or gauze.
How do I know if my puppy has an ear infection?
Watch for redness, swelling, frequent scratching, head shaking, thick discharge, pain when touched, or an unpleasant smell.
These signs usually require veterinary treatment rather than additional cleaning.
What age can I start cleaning my puppy’s ears?
You can begin gently handling your puppy’s ears as soon as they come home, usually around 8–10 weeks of age.
If cleaning is needed, use only a veterinarian-approved ear cleaner and be especially gentle with very young puppies.
Can swimming increase the risk of ear infections?
Yes.
Water trapped inside the ear creates a moist environment where bacteria and yeast can grow.
Dry your puppy’s ears after swimming and ask your veterinarian whether a drying ear cleaner is appropriate.
Should I clean both ears if only one looks dirty?
It’s fine to inspect both ears, but only clean the ear that actually needs it unless your veterinarian advises otherwise.
Healthy ears generally don’t benefit from unnecessary cleaning.
Conclusion
Learning a few simple puppy ear cleaning tips can make a big difference in your puppy’s long-term health and comfort. By checking your puppy’s ears regularly, using a vet-approved ear cleaner, and cleaning only when needed, you can help prevent wax buildup, reduce the risk of painful infections, and make grooming a positive experience from an early age.
Remember that healthy ears should look light pink, smell neutral, and stay free of excessive wax or discharge. If you ever notice redness, swelling, a strong odor, thick debris, or signs that your puppy is in pain, it’s best to stop cleaning and contact your veterinarian. A calm, consistent routine combined with early attention to warning signs will help keep your puppy’s ears healthy for years to come.

Muzammil Khan is a certified canine behaviorist and the founder of Puppywhisper. With 8+ years of experience in positive reinforcement training, Muzammil has helped over 1,000 puppies transition smoothly into their new homes. All health advice is reviewed in collaboration with licensed veterinarians.